XTAL body setup
- Download the XTAL body file for your tracker/clipon from the ART tracking folder
- XTAL 3 body Passive Clipon if you have the XTAL 3 headset equipped with passive ART clipon
- XTAL body Active Clipon if you have the XTAL 5k or XTAL 8k headset equipped with active ART clipon
- XTAL body Passive Clipon if you have the XTAL 5k or XTAL 8k headset equipped with passive ART clipon (use T1 or T2 depending on the marker configuration on your ART clipon)
- For custom passive/active marker setup you can skip this section and proceed with a standard ART body calibration
- Go to ‘Tracking’-’Body administration’
- Add a new body (by changing the number of bodies)
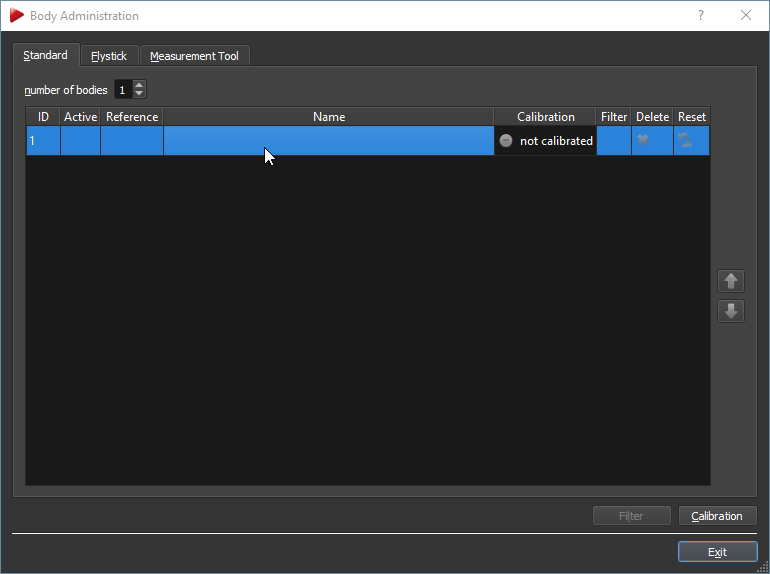
- Click on ‘Calibration’ button
- In the ‘Body Calibration window’ click on ‘Load file(s)’ button
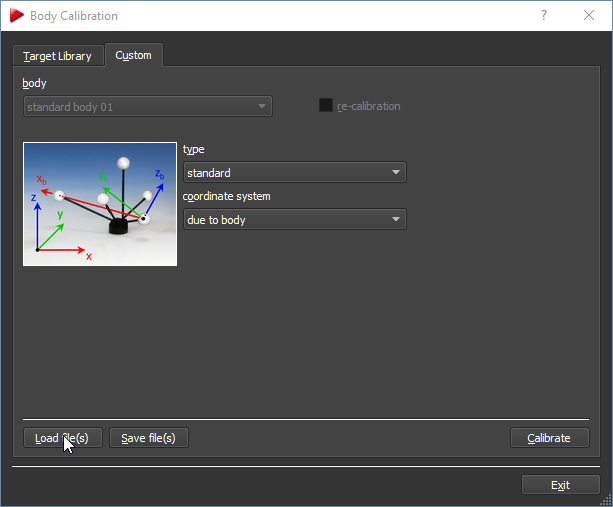
- Select the downloaded ‘XTAL_body_….txt’ file and click on ‘Open’

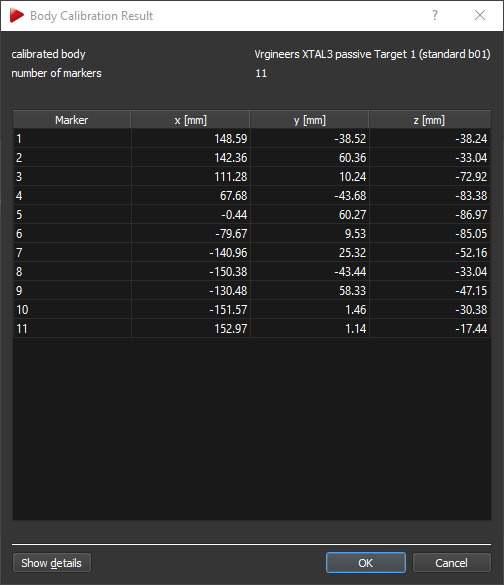
- You should see the ‘Body Calibration Result’ window with:
- 11 Markers for XTAL 3 body Passive Clipon
- 12 Markers for XTAL body Active Clipon
- 8 Markers for XTAL body Passive Clipon
- The XTAL body is now set and ready for use in DTRACK
This page was last modified on March 21st, 2023 at 11:53
< PreviousNext >